Task Table
Tasks are the basis for estimating, scheduling, job costing, billing, and job profitability reports.
Tasks are the basis for estimating, scheduling, media buying, job costing, billing, and job profitability reports. Since they serve so many functions, they're very important. Your tasks are completely customizable. The tasks you add to your Task Table reflect the diversity of the work you do.
Since they serve so many functions, they’re very important. Your tasks are completely customizable. The tasks you add to your Task Table reflect the diversity of the work you do. That’s why no two companies have the same tasks. Tasks are flexible. Every job has at least one task, but may have dozens. The task table is a central warehouse for every task you’ve ever used, or will use. The task table itself may contain hundreds of tasks.
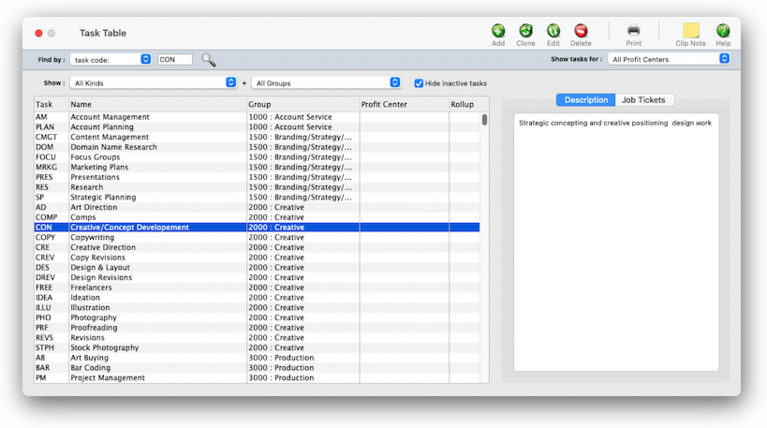
Each task has standard details, or defaults, that are copied to your jobs. This information, including sales tax settings, markups, and billing rates, automate much of your job tracking. You can add new tasks, make changes, or delete tasks anytime, for any reason. Task codes are highly customizable. 📍See examples: CON (concept), COPY (copywriting), MDIGB (digital media buying)
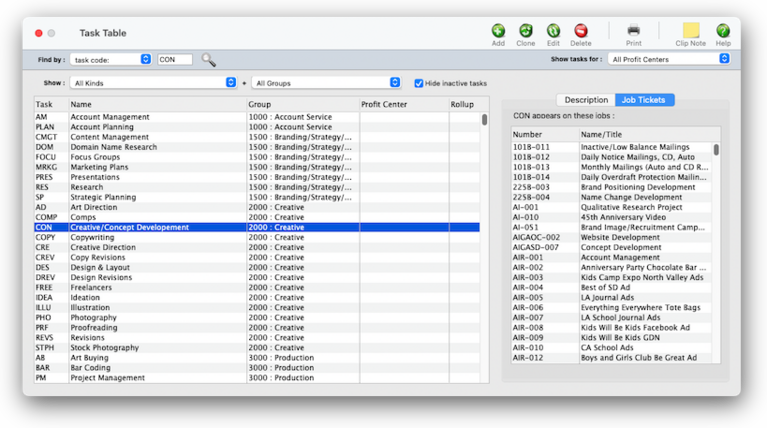
🔹To see/use tasks, choose Setup > Task Table.
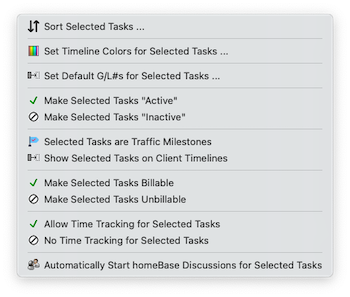
At first the Task Table only shows active tasks. Since tasks can’t be deleted if they exist on old jobs, you’ll eventually have a lot of obsolete tasks on the Task Table. These outdated tasks can be made inactive to keep them off the Lookup List and the task list. This helps prevents old tasks from being inadvertently used on new jobs. To see both active and inactive tasks, click the Show/Hide button. Several tasks can be made inactive (or vice versa) by selecting them with your mouse, then clicking the button.
HERE'S HOW IT WORKS
• A task is identified with up to a 4-letter code.
• The task code can contain any combination of letters or numbers (or both).
• Every task has a name that appears on estimates, invoices, and reports.
• Clients always see the name, not the code.
• Task Table & the lookup list.
• Not every user can add new tasks, or edit existing tasks.
• Reviews & approvals are task-based.
• Customizable credit & debit G/L accounts, markups, billing rates, and more.
• Traffic priority & standard lead times.
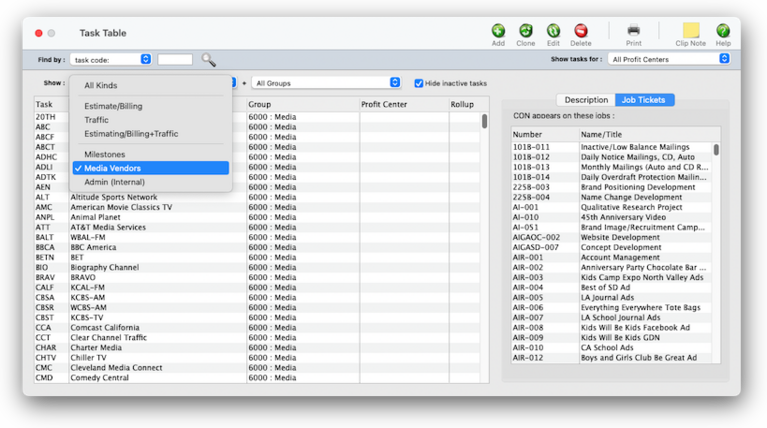
• Estimate/billing tasks.
• Traffic-only tasks.
• Estimate/billing+Traffic tasks.
• Media vendor tasks.
• Milestone tasks.
• Admin (Internal) tasks.
• Tasks can roll up into other tasks on estimates & invoices.
• Tasks can be taxable.
• Tasks can be tagged for homeBase discussions.
✳️ Different kinds of tasks do different things By tracking time for each staff member, you’ll get productivity reports that compare billable versus unbillable time, time by client, time by task, and more. With practice, these reports can help you see where people are working most effectively.
✳️ Tasks belong to groups The vendor diary does not keep an automatic log of every vendor activity. That would create an immense number of entries. Instead, the vendor diary is used like a daily log. Anyone who works with one vendor account can make notes about phone calls, meetings, etc. These entries are intended to help accounting people to manage vendor accounts and to track payables and payments.
✳️ Job templates are built from tasks The vendor diary does not keep an automatic log of every vendor activity. That would create an immense number of entries. Instead, the vendor diary is used like a daily log. Anyone who works with one vendor account can make notes about phone calls, meetings, etc. These entries are intended to help accounting people to manage vendor accounts and to track payables and payments.
📎 cGL vs dGL The debit and credit accounts on your job tasks automate the financial accounting for job costs and client billing. These default accounts are copied from the Task Table when a new task is added to a job ticket. They are then copied to A/P and A/R invoices whenever you type in a job task then press Tab. They prevent data-entry errors that can make your financials less accurate, since cGLs (i.e., credit G/L accounts) and dGLs (i.e., debit G/L accounts) are set by default. They ensure that the same G/L accounts will be updated whenever a certain job task is used for costing or billing. (Plus, it's simpler for users since they don't have to decide which debit or credit G/L account to use for job costing and billing). The job task's cGL is copied to client invoices, and is an income G/L account. The job task's dGL is copied to vendor invoices and job cost checks, and represents a cost G/L account.
📎 Tasks can be taxable There are separate passwords for the desktop app and the web app, as well as expirations and other others. There's a link to reset the user password.
📎 Sort and Sort on Schedule he sort number is used within groups on estimates and A/R invoices. Job tasks can be sorted differently on the job schedule with a sort number. In most cases, you would number tasks in the order in which the work is done.
⚠️ A task that's used on any job, opened or closed, can't be deleted. Instead, make the task inactive to keep it from being used again on new jobs.
When the Task Table window is opened, the last-used client is displayed automatically.
1️⃣ Choose My > My Clients.
The Clients window opens, displaying the previously viewed client.
2️⃣ Enter a client number in the Find Number field, then click the magnifying glass icon.
3️⃣ Choose My > My Clients.
The Clients window opens, displaying the previously viewed client.
4️⃣ Enter a client number in the Find Number field, then click 🔎 icon.
5️⃣ Choose My > My Clients.
The Clients window opens, displaying the previously viewed client.
6️⃣ Click Save.
You can find clients by organization name, cost center, or by sequence (i.e., the order in which clients were added). Click the previous and next buttons to browse clients sequentially. You can alternately view a client by choosing it from the Show drop-down menu.
1 Click the add button or choose Edit > Add New Vendor.
2 Enter the new vendor’s number, name, address and other details then click Save.
New vendors are not automatically numbered. Any kind of 10-character number or code can be used.
Click here for step-by-step instructions.
1 Click the Delete toolbar button, or choose Edit > Delete.
A vendor with invoices or POs can’t be deleted. Instead, an old vendor can be made inactive by choosing Edit > Edit Vendor then unchecking the Active checkbox. Inactive vendors don’t appear on lookup lists or vendor reports and can’t be used for new purchase orders or A/P invoices. Inactive vendors can be used again by simply checking the Active checkbox.
1 Choose Edit > Edit Vendor, or click the Edit button.
2 Check or uncheck the Active checkbox, then click Save.
Inactive vendors don’t appear on the lookup list nor can purchase orders or payables be added for them.
2 Enter the vendor’s contact names and phone numbers, then click Save.
The vendor diary does not keep an automatic log of all changes or activity for the vendor, instead meetings and events for this vendor are manually added to the diary. Staff members can be notified of the event by e-mail sent directly from the vendor diary.
Vendor diary entries are part of the C&P e-mail system, and will automatically notify users at the right time (either when a diary entry is added or when a scheduled entry is due.) Like other e-mail messages, vendor diary entries can be e-mailed to any staff member. In addition, copies of the messages can be forwarded to two other addresses. When a scheduled entry is mailed, Clients & Profits marks the entry as “sent.”
To add a vendor diary entry
1 In the Diary/Calls tab, click the add diary/call entry button.
2 Enter the date, added by, event/action and invoice # related to the event or meeting. Vendor diary entries can be scheduled for some time in the future. These entries work like a “tickler” file, reminding people in accounting about ongoing issues with a vendor.
3 Select a staff member from the Notify pop-up menu to send an e-mail message with the diary entry as the body of the message.
Additional staff members or someone outside the company can also be notified by typing in their e-mail address in the cc: or bcc: fields.
4 Click Save.
Vendor diary entries can also be added from the Accounts Payable and Checkbook window. This lets users make quick, easy notes about a vendor when payables or checks are added.
TIPS
📌 You can provide access to specific menu commands, as needed. When a user doesn’t have access to a menu command, it appears dimmed and can’t be chosen. This prevents a user from working in some place they shouldn’t. For example, you can give a user access to Media, to add, change, and print media plans, but not Accounts Payable or the Checkbook.

📌 As a security feature, staff members can be restricted from seeing and working on jobs from certain clients. It's an option if you have account teams that need to kept apart from other account terms. See My > Clients > Staff Client Access.
FAQs
💬 What about freelancers? Staff records can be marked as a freelancer (non-employee). Time sheets for freelancers can be summarized on special time and productivity reports, helping you analyze the value of freelance time vs. staff time on each client.
💬 Can I change the staff member's initials? Yes, the Re-number utility will change all of a staff member's time entries, job tasks, etc. automatically. If the staff member also has a vendor account (which is used for expense report reimbursements) it will be renumbered as well.
SEE MORE
Client Staff Access
Recurring Payable Worksheet
How to add a recurring payable for a vendor
EXPLAINERS
Freelancers vs. Staffers
Owners & Principals
What To Do When a Staff Member QuitsWorking w/Freelancers
© 2026 Clients & Profits, Inc.


